What do you need:
-little buckets (dollar section at Target)
-one large bucket (optional, dollar section at Target)
-Drill, drill bits, short screws OR strong glue like E-6000 (Hobby Lobby)
-paint and paint brushes, if not using spray paint
-sand paper
-face mask or rag
 |
| Lazy susan slightly sanded to rough up the surface and help paint adhere. |
| Here I am sanding the freshly painted surface and distressing the edges. FYI: Use gloves. So much paint dust got on my hands and under my fingernails, as I sanded. |
 |
| Two reasons you need a face mask: #1: Breathing in paint dust CANNOT be good for you. #2: They just make you feel so darn cool. |
| Word on the street has it that if you don't have this glue in your crafting supplies, you're not a REAL crafter. GULP. I ran out to buy this glue asap, costing a mere $3.99 from Hobby Lobby. The Crafter's File Box tutorial used this glue to secure her buckets to the LS, but since the temp was too cold for it to dry in the garage, and it had a VERY strong odor, my husband suggested screwing down the buckets instead of gluing them. I was glad we chose this method of securing the buckets. And I am happy that I have E-6000 on-hand now. |
 |
| Up-close of pre-drilling. DH didn't want to put any pressure on the bottom of the buckets while screwing it onto the lazy susan, so as to avoid bending the metal. This worked great. |
 |
| It's helpful, but not necessary to have someone hold the bucket while someone drills. I was the helper while DH handled the power tools. Next time, I want to drill. Ar! Ar! |
 |
| The view inside the buckets after being secured to lazy susan with a screw. |
 |
| Half way done: I added the big bucket in the middle to hold bigger items like water color paints, etc. |
 |
| Four buckets attached, four more to go. |
 |
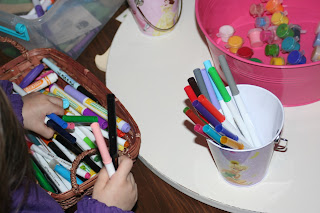
| Trial run: Laney was SO excited to put her art supplies into the buckets! In this picture, I only had four little buckets. I added four more buckets a few days later. All done! |
 |
 |
| Overhead view of finished product Still hoping to add some paint brushes and a few other things to her supplies. Any suggestions? |
 |
| I must say, I absolutely LOVE how it came out. I love how practical it is. And most of all, the girls love it! |


6 comments:
you rock, hollie carson!!!
love how you see an idea that you like, and you make it happen! you look good with saw in hand! you should make/sell those!!
love you!
How creative! This looks so simple and cute too. Thanks for sharing!
love it! been wanting to make one of these since i saw it at pbk too! here are 2 other cute ones i'm eyeing:
http://www.marthastewart.com/article/tin-can-caddy
http://momscraftyspace.blogspot.com/2010/06/upcycled-montessori-style-crayon-holder.html
Lindsey,
So super cool! LOVE those two links! So much creativity out there!
One little tip is to put the markers in the buckets lid down, so they do not dry out quickly. :) Also, my girls love stickers for craft-making.
Alison,
Great ideas. I will turn those markers cap down thanks to your suggestion. Also, I need to find an empty bucket on the art caddy to place stickers. I guess I could roll my sheets of stickers in one roll and place in a little bucket? Right now there are in a plastic pencil box on the shelf. Great suggestions! Thanks for chiming in!
Post a Comment