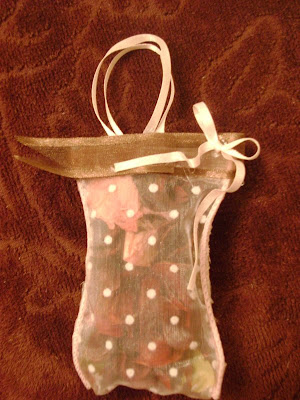
 Potpourri Ribbon Sachet: One year for the Seminary Craft Fair, I made these supe, fun ribbon sachets that smell soo good! Here's a brown and pink one I made. The coloring might not be displayed very well in this picture, but it will suffice. What I love about this project is that you don't need a sewing machine! You don't have to know how to sew to have great crafting skills.
You need:
-Glue gun/glue sticks - the smaller, the better, but can use the bigger one too
-wide ribbon: I like to use wide, wire ribbon
-Potpourri
-thin ribbon cording, really thing
-thin ribbon of different colors
How to:
1.) Cut ribbon to desired length. I used different lengths, but liked 9-10" the best.
2.) Fold ribbon in half. \
3.) Hot glue the sides together, leaving half an inch on top.
4.) Let cool for a few minutes. Go ahead and glue some more while you're waiting.
5.) Stuff to the top with your favorite yummy potpourri.
6.) Fold over the 1/2 inch that isn't glued.
7.) Make a hanging loop: Cut a little 3-4" piece of thin ribbon or thin cording. Apply glue into each side of the folded top part of the sachet and quickly place ends of ribbon/cording into the hot glue. You can also make a loop on one side of the sachet.
8.) Decorate with thin ribbon to hide the folded closure by gluing the thin ribbon all the way around the top
9.)Decorate the front of the sachet. I loved this part! I used some of these as Christmas ornaments and put Christmas potpourri in them. I decorated the sachet with twisted green ribbon making a tiny wreath to serve as my "loop". I liked making tiny bows and hot gluing the ends down with a ripple-effect.

No comments:
Post a Comment