
PIcky Toddlers
Posted by | Thursday, February 24, 2011 at 7:00 AM
I just read an article with some tips about dealing with picky toddlers and I thought I would share the link :http://www.modernalternativemama.com/blog/2011/2/1/handling-picky-real-food-toddlers.html


Six Meals from One Chicken
Posted by | at 9:11 AM
I thought this post from Heavenly Homemakers would interest a lot of you. Laura shares how to make six meals from one chicken. I just so happen to have a chicken calling my name from the freezer. Let our six meals begin!
Snacks and lunches kids will eat
Posted by | at 8:00 AM
My girls seem to enjoy fingerfood/ snacks more than any other kind of food. They would be perfectly happy eating them for every meal! Since snacks can actually be very healthy (as well as super easy to throw together!), we often eat a combination of them for our lunches whenever we don't have leftovers from last nights dinner. I usually try to have a dairy/protein, a grain/nut, and fruit combination. Cheese chunks, almonds, and sliced apples is a favorite lunch combination, as well as plain yogurt, granola, raisins, and dehydrated coconut. Here are some of our favorite snacks/lunches, and I would love to get some more ideas to add to my list from our POH readers! Please share!
soaked and dehydrated almonds
soaked and dehydrated pecans
cheese chunks, raw if possible!
raisins
grapes, apple slices, banana, and other fruit, often with sunflower or almond butter
frozen blueberries (very messy, though, so not good for the car! But they are my girls' absolute favorite and we always keep some in the freezer for a quick fix for teething and busted lips :)
frozen or cooked peas
home-made granola
Home-made "power bars"
dehydrated, unsweetened coconut flakes
cut up dates, often with sunflower or almond butter on them
black beans (my girls will eat them cold! But they stain as well, so be careful!)
cooked brown rice pasta (yes, they will eat that cold, as well :)
home-made crackers
mini-muffins
breakfast cookies
applesauce -- if you don't make your own, then please buy the unsweetened kind so you aren't giving your kids HFCS!!! The "original" kind is full of HFCS!
yogurt -- if you don't make your own, then try to get plain (unflavored) full-fat yogurt. It can be hard to find. When we are on the road, we get Fage Greek yogurt for the girls or Organic Stonyfield plain with the cream on top.
Coconut oil chocolate candy with raisins, slivered almonds, and coconut (a great way to get more coconut oil into them!)
Picky Eaters
Posted by | at 5:14 AM
I have a picky eater. If given the choice, Meredith (four years) would happily eat bread or some form of it for every single meal. She will eat a few vegetables and likes some fruits but generally has to be encouraged to eat anything that isn't carbohydrate based. I used to really beat myself up about it and wonder how I managed to raise such a picky eater despite my best efforts. But, now we also have Jonathan (three years) who is completely different than his sister. He is excited about trying new foods and has a wide variety of favorites. (We also have Lydia, who is eight months and isn't eating much at all right now. It remains to be seen if she will be more like her sister or brother in this respect.) Having two totally different eaters I am now more inclined to think that some children are naturally disposed to being more sensitive to different tastes and flavors (even familiar ones). Meredith is also more sensitive to anything enhanced by herbs or spices, even in butter she thinks it too salty or sweeter things like smoothies. She complains they are too "spicy" for her.
So, what have we done about it? First, I never fix separate meals. We all eat the same thing for dinner and if she doesn't like it, she has to try a few bites and then may politely decline the rest. That being said, I try not to fix a totally weird, adult only kind of meal. There is usually one or two things at ever meal that everyone likes. Everyone at the table has to try a few bites of everything offered (within reason). We usually give them a specific number. Thankfully, she usually will force herself to eat the alloted number of bites with a good attitude and we haven't had any food standoffs yet. (I have found that she thinks it is perfectly acceptable to be expected to eat four big bites because she is four.) There have been a few times when she was around two when she wouldn't eat anything except the couple of bites we asked her to and then we would offer her a glass of milk to round out the meal. If there is an ingredient like tomatoes or onions in a casserole or something that someone doesn't like they can quietly pick it out and leave it on their plate. We have tried to teach them not to complain about what is served and to be thankful.
Mealtimes still aren't perfect at our house and we are always reevaluating our approach as our kids grow and mature. What are your ideas for helping picky eaters? We'd love to hear from you!
Fun with Food
Posted by | Tuesday, February 22, 2011 at 10:11 AM
Leah P. asked me to share with you how we have fun with our food at the Potter house. I have 5 kids under the age of 7. My mom used to do fun things with our food sometimes when I was a kid. She'd make green shamrock pancakes on St. Patrick's Day, cut faces in our bologna and arrange our fruit in flower shapes. So when my son was around 3 it seemed only natural to make his sandwiches into faces.
here's a link to the snow ice cream recipe.
You often hear that getting your kids involved in making their meals will make it more likely that they'll eat them. I have found this to be true. You would not believe the fun they have eating a "picture" piece by piece. "I ate his eye ball, Mom!" "My guy has no nose!" They love it. I've gotten my kids to unwittingly eat some foods they were not so fond of this way.
Below is a slideshow of some examples of our adventures with food. As I went through my photos looking for these I realized it may appear that my kids eat only sandwiches, pretzels and grapes—not so.
A friend of mine showed me this blog. This mom really goes all out for her kids's lunches. I keep it pretty simple. She has a lot of good examples of healthy/organic foods to use.
Here's a few things to remember:
• Keep it simple. It's not like you have to get special foods, just use what you have in a creative way.
• Never underestimate the number of ways you can cut a sandwich or arrange it on a plate.
• Fruit can be cut so many different ways.
• Cookie cutters are not just for cookies.
• It doesn't have to be wasteful to cut sandwiches into shapes. I usually eat the remnants for my lunch or feed them to the baby who needs his cut up anyway.
• This is a great "cool mom" thing to do when you're babysitting or your kids have little friends over.
Check these pics out and get inspired to have fun with your food!
here's a link to the snow ice cream recipe.
Leah F's Baby Wearing
Posted by | Friday, February 18, 2011 at 8:58 PM
Here is a quick rundown on the baby carriers I use!
I have a homemade pouch sling (using the wonderful Leah P's instructions) that I love. It is in one of my favorite fabrics :-) and is easy to roll up and throw in my diaper bag. I like this carrier for when babies are little especially, because it is great for snuggling. Eleanor has used this sling multiple times and she likes it. When she is fussy, I can put her in the sling and she will calm down.

I also have a homemade knit wrap similar to a Moby Wrap. A friend of mine made it for me, and though I have not used it yet for my youngest, I used it a lot for my other two children. I found it to be a very comfortable way to carry my child as they got bigger (the pouch sling didn't work as well for me once the kids were 4+ months old). The problem with the knit wrap is the sheer amount of fabric--there is TONS of it. I can't just throw this wrap in my bag and go. It can also get hot with all that fabric wrapped around you. But, that said, for weight distribution and comfort, it was great!
For Christmas this year, my wonderful in-laws indulged me and bought me an Ergo carrier! I have used this once or twice with an infant insert with Eleanor and I really enjoy it. I look forward to using this much more with Eleanor as she grows.
Question to our readers who are Ergo users: Do you find that using the Ergo causes you to slump/roll your shoulders a lot? I do not have great posture anyway, and I find that while wearing the Ergo I am kind of rolling my shoulders forward. My shoulders slope--I have a hard time keeping a purse strap on my shoulder--and I feel like I am hunching my shoulders to keep the straps from falling down. I imagine that the solution is getting the right adjustment on the straps, but I wanted to know if others have this issue.
So let us know--are you a babywearing advocate? if so, what kind of carrier do you use?
Intro to Baby Carriers
Posted by | Tuesday, February 15, 2011 at 9:19 AM
This week we'd love to share about Babywearing. We originally covered this topic in October of 2007.
Ring Slings - PROS: inexpensive to make, pretty fabrics; CONS: not as comfortable w/ toddlers, fussing w/ the rings
Pouch Slings - PROS: easiest to use, pretty fabrics; CONS: not adjustable
Mei Tai - PROS: good weight distribution, pretty fabrics; CONS: long tails of fabric, more cumbersome to put on
Cotton Wraps (like Moby) - PROS: good weight distribution, holds baby securely; CONS: plain fabric, takes time to wrap it around, covers your whole outfit
Woven Wraps (like Didymos) - PROS: good weight distribution, holds baby securely, very versatile; CONS: must learn to wrap each carry, fabric drags when putting it on
Ergo - PROS: great weight distribution, very comfortable; CONS: a little hard to snap on
Structured - PROS: inexpensive, can be bought in a store; CONS: not good for baby's development, not comfortable
I’ll also throw in here my top picks for a few categories. I’m sure the other authors will chime in as well with their picks.
For a Newborn Baby, I pick a Ring Sling or a Cotton Wrap because these mold the best to the little newborn ball of a baby.
For Someone who can only get ONE carrier (boohoo for you!), I pick an Ergo because this really is the cream of the crop. I’ve heard tons of raves about it and never heard of someone who didn’t like it. (Ironic: I don’t actually own one of these! I made all of my own baby slings and couldn't ever bring myself to spend the money.)
The Easiest in my opinion is the Pouch Sling. This is probably the one I used the most with both my kids. I used it until my kids were almost 2. I used the hip carry to take them in the store, to church, and out and about when it wasn't convenient to have a stroller.
HELPFUL LINKS
Baby Carriers are a great way to tote your little one around – you can use one while at the store, around the house, or to church. The following post will include 1) Types of Slings, 2) Different Ways to Carry the Baby, 3) Benefits of Each Type of Carrier, and 4) Helpful Links.
TYPES OF CARRIERS

Ring Slings – A one-shoulder type carrier. They are adjustable because of the rings that hold the fabric together around your body. They can have a short tail (the part that hangs down in front) or a long tail. A longer tail can serve as a cover-up for wind protection, nursing, or sleeping babies who don’t want to be disturbed.

Pouch Slings – Also a one-shoulder type carrier. They are not adjustable, and must be made/purchased according to the size of the wearer. They are the easiest to use of the carriers because there is no adjusting to be done – you pop baby in and out fairly easily. These are now being sold at select Target stores under the Hotslings brand name.

Mei Tai – A two-shoulder sling that requires tying. There is a body and four long strips of fabric that make up this sling. The bottom strips are tied around the waist, and the top strips are wound around in different ways to carry baby.

Wraps – A long strip of fabric that can be tied in a number of ways. There are wraps made of stretchy, t-shirt like materials (i.e. Moby Wraps) and wraps made of woven fabrics. The fabric is wound around mom and baby to create different carries.

Ergo Carrier – A constructed carrier that distributes the baby's weight evenly over the parent's body because it has two shoulder straps and a very supportive waist belt. There is also an infant insert, blanket-type thing that can be used with small babies. This carrier is especially great as your baby gets heavier.

Structured Carrier – The most popular being the Baby Bjorn. These carriers are worn over two shoulders.
TYPES OF CARRIES
Here are the the types of slings/carriers that can be used for each carry.
1)Cradle Carry – Ring, Pouch, Wrap & Ergo w/ Infant Insert
2)Tummy to Tummy Carry – Ring, Pouch, Mei Tai, Wrap, Ergo & Structured
3)Kangaroo Carry – Ring & Pouch
4)Front Facing Carry, Legs Out – Structured (this is not a recommended carry because baby's back is not encouraged to round, but to hollow. Also, all of his weight is being held by his crotch.
5)Hip Carry – Ring, Pouch, Mei Tai, Wrap & Ergo
6)Back Carry – (Can be done in Pouch & Ring Sling – but it’s awkward), Woven Wraps & Ergo
PROS/CONSTYPES OF CARRIERS

Ring Slings – A one-shoulder type carrier. They are adjustable because of the rings that hold the fabric together around your body. They can have a short tail (the part that hangs down in front) or a long tail. A longer tail can serve as a cover-up for wind protection, nursing, or sleeping babies who don’t want to be disturbed.

Pouch Slings – Also a one-shoulder type carrier. They are not adjustable, and must be made/purchased according to the size of the wearer. They are the easiest to use of the carriers because there is no adjusting to be done – you pop baby in and out fairly easily. These are now being sold at select Target stores under the Hotslings brand name.

Mei Tai – A two-shoulder sling that requires tying. There is a body and four long strips of fabric that make up this sling. The bottom strips are tied around the waist, and the top strips are wound around in different ways to carry baby.

Wraps – A long strip of fabric that can be tied in a number of ways. There are wraps made of stretchy, t-shirt like materials (i.e. Moby Wraps) and wraps made of woven fabrics. The fabric is wound around mom and baby to create different carries.

Ergo Carrier – A constructed carrier that distributes the baby's weight evenly over the parent's body because it has two shoulder straps and a very supportive waist belt. There is also an infant insert, blanket-type thing that can be used with small babies. This carrier is especially great as your baby gets heavier.

Structured Carrier – The most popular being the Baby Bjorn. These carriers are worn over two shoulders.
TYPES OF CARRIES
Here are the the types of slings/carriers that can be used for each carry.
1)Cradle Carry – Ring, Pouch, Wrap & Ergo w/ Infant Insert
2)Tummy to Tummy Carry – Ring, Pouch, Mei Tai, Wrap, Ergo & Structured
3)Kangaroo Carry – Ring & Pouch
4)Front Facing Carry, Legs Out – Structured (this is not a recommended carry because baby's back is not encouraged to round, but to hollow. Also, all of his weight is being held by his crotch.
5)Hip Carry – Ring, Pouch, Mei Tai, Wrap & Ergo
6)Back Carry – (Can be done in Pouch & Ring Sling – but it’s awkward), Woven Wraps & Ergo
Ring Slings - PROS: inexpensive to make, pretty fabrics; CONS: not as comfortable w/ toddlers, fussing w/ the rings
Pouch Slings - PROS: easiest to use, pretty fabrics; CONS: not adjustable
Mei Tai - PROS: good weight distribution, pretty fabrics; CONS: long tails of fabric, more cumbersome to put on
Cotton Wraps (like Moby) - PROS: good weight distribution, holds baby securely; CONS: plain fabric, takes time to wrap it around, covers your whole outfit
Woven Wraps (like Didymos) - PROS: good weight distribution, holds baby securely, very versatile; CONS: must learn to wrap each carry, fabric drags when putting it on
Ergo - PROS: great weight distribution, very comfortable; CONS: a little hard to snap on
Structured - PROS: inexpensive, can be bought in a store; CONS: not good for baby's development, not comfortable
I’ll also throw in here my top picks for a few categories. I’m sure the other authors will chime in as well with their picks.
For a Newborn Baby, I pick a Ring Sling or a Cotton Wrap because these mold the best to the little newborn ball of a baby.
For Someone who can only get ONE carrier (boohoo for you!), I pick an Ergo because this really is the cream of the crop. I’ve heard tons of raves about it and never heard of someone who didn’t like it. (Ironic: I don’t actually own one of these! I made all of my own baby slings and couldn't ever bring myself to spend the money.)
The Easiest in my opinion is the Pouch Sling. This is probably the one I used the most with both my kids. I used it until my kids were almost 2. I used the hip carry to take them in the store, to church, and out and about when it wasn't convenient to have a stroller.
HELPFUL LINKS
http://www.slingyourbaby.blogspot.com/ (I know, a personal plug!)
Introducing Abbi Grace DeLong!
Posted by | Monday, February 14, 2011 at 3:18 PM

Born Tuesday, February 8th at 9:01 am
Weighing 8 pounds, 8 ounces and 20 inches long
Praising God for His grace and perfect timing!
If you want to read her birth story, click HERE

Easy Valentine's Day Treats
Posted by | Sunday, February 13, 2011 at 3:00 PM
Oreo Bon-bons
1 package Oreos
1 8 oz. package cream cheese, softened
Chocolate candy coating, or chocolate chips
After opening Oreo package and eating several...

Place the remaining Oreos in ziploc bag and crush into small pieces. You can also use a food processor, but it is fun to 'beat up' the Oreos (I used my mini chopper after I let the kids mash the Oreos so the crumbs would be finer).

Dump the Oreo crumbs into a bowl with the softened cream cheese. Mix the two ingredients together. Easiest way to do that is with your hands! It makes your fingernails filthy, but it gets the job done.


Once throughly mixed, roll the mixture into balls. I used my 1/2 Tbs. measuring spoon to scoop up the mixture and keep the size more uniform. Put the Oreos balls in the refrigerator to firm up and set.

Melt the chocolate coating according to the directions (or the chocolate chips slowly in the microwave). If using chocolate chips, you may want to add a little bit of shortening to thin it out. Once the chocolate is melted, dip the Oreo balls into the chocolate and place on wax paper. Return to the refrigerator to help the chocolate harden. I sprinkled red sugar on the bon-bons for a Valentine's Day touch, but you can also drizzle white or dark chocolate over them for an elegant touch. Once completely cool, place in cute bags or containers to give as gifts!


And just for fun, here are two more recipes:
Peanut Butter Truffles (from Southern Living Magazine)
1 (12 oz.) package semisweet chocolate morsels
1/2 cup whipping cream
3 Tbsp creamy peanut butter
3/4 cup finely chopped, lightly salted roasted peanuts
Wax paper
Microwave first three ingredients in a medium-size microwave-safe bowl at HIGH 1 to 1 1/2 minutes or until melted and smooth, stirring at 30 second intervals. Let cool 10 minutes. Beat chocolate mixture at medium speed with an electric mixture 1 to 2 minutes or until whipped and smooth. Cover and chill 2 hour or until firm. Shape chocolate mixture into 1 inch balls, using a small ice cream scoop. Roll in chopped peanuts. If mixture becomes too soft to shape, refrigerate until firm. Place on wax paper lined baking sheets. Chill 1 hour before serving. store truffles in an airtight container in refrigerator up to 5 days.
Cheerio Treats
1 bag (or more!) jumbo marshmallows
2-3 Tbsp butter
1/2 cup creamy peanut butter
5 cups Cheerios cereal
1 cup M&Ms or raisins
Butter a 9x13 glass pan and set aside. Microwave first three ingredients in microwave safe bowl until marshmallows are melted, stirring occasionally (you can also melt them on the stove as well, if you prefer). Add Cheerios cereal and stir to coat completely. Add M&Ms last, and turn the mixture out into buttered pan. Using your hands or a buttered flat spatula, press the Cheerios mixture into the pan. You may sprinkle extra M&Ms over the top, or drizzle melted chocolate over it. Refrigerate the pan to cool. After it has cooled, cut into bars and enjoy!
1 package Oreos
1 8 oz. package cream cheese, softened
Chocolate candy coating, or chocolate chips
After opening Oreo package and eating several...

Place the remaining Oreos in ziploc bag and crush into small pieces. You can also use a food processor, but it is fun to 'beat up' the Oreos (I used my mini chopper after I let the kids mash the Oreos so the crumbs would be finer).


Dump the Oreo crumbs into a bowl with the softened cream cheese. Mix the two ingredients together. Easiest way to do that is with your hands! It makes your fingernails filthy, but it gets the job done.


Once throughly mixed, roll the mixture into balls. I used my 1/2 Tbs. measuring spoon to scoop up the mixture and keep the size more uniform. Put the Oreos balls in the refrigerator to firm up and set.

Melt the chocolate coating according to the directions (or the chocolate chips slowly in the microwave). If using chocolate chips, you may want to add a little bit of shortening to thin it out. Once the chocolate is melted, dip the Oreo balls into the chocolate and place on wax paper. Return to the refrigerator to help the chocolate harden. I sprinkled red sugar on the bon-bons for a Valentine's Day touch, but you can also drizzle white or dark chocolate over them for an elegant touch. Once completely cool, place in cute bags or containers to give as gifts!


And just for fun, here are two more recipes:
Peanut Butter Truffles (from Southern Living Magazine)
1 (12 oz.) package semisweet chocolate morsels
1/2 cup whipping cream
3 Tbsp creamy peanut butter
3/4 cup finely chopped, lightly salted roasted peanuts
Wax paper
Microwave first three ingredients in a medium-size microwave-safe bowl at HIGH 1 to 1 1/2 minutes or until melted and smooth, stirring at 30 second intervals. Let cool 10 minutes. Beat chocolate mixture at medium speed with an electric mixture 1 to 2 minutes or until whipped and smooth. Cover and chill 2 hour or until firm. Shape chocolate mixture into 1 inch balls, using a small ice cream scoop. Roll in chopped peanuts. If mixture becomes too soft to shape, refrigerate until firm. Place on wax paper lined baking sheets. Chill 1 hour before serving. store truffles in an airtight container in refrigerator up to 5 days.
Cheerio Treats
1 bag (or more!) jumbo marshmallows
2-3 Tbsp butter
1/2 cup creamy peanut butter
5 cups Cheerios cereal
1 cup M&Ms or raisins
Butter a 9x13 glass pan and set aside. Microwave first three ingredients in microwave safe bowl until marshmallows are melted, stirring occasionally (you can also melt them on the stove as well, if you prefer). Add Cheerios cereal and stir to coat completely. Add M&Ms last, and turn the mixture out into buttered pan. Using your hands or a buttered flat spatula, press the Cheerios mixture into the pan. You may sprinkle extra M&Ms over the top, or drizzle melted chocolate over it. Refrigerate the pan to cool. After it has cooled, cut into bars and enjoy!
DIY Felt Valentine Heart
Posted by | Friday, February 11, 2011 at 9:25 AM
Happy Valentine's Day week!
Want to make a Felt Valentine Envelope similar to the one from Pottery Barn? I made one following a tutorial from the Crafting Chicks.
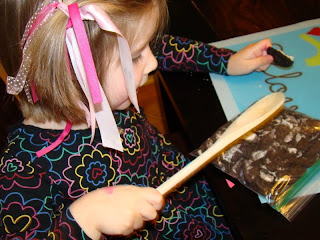
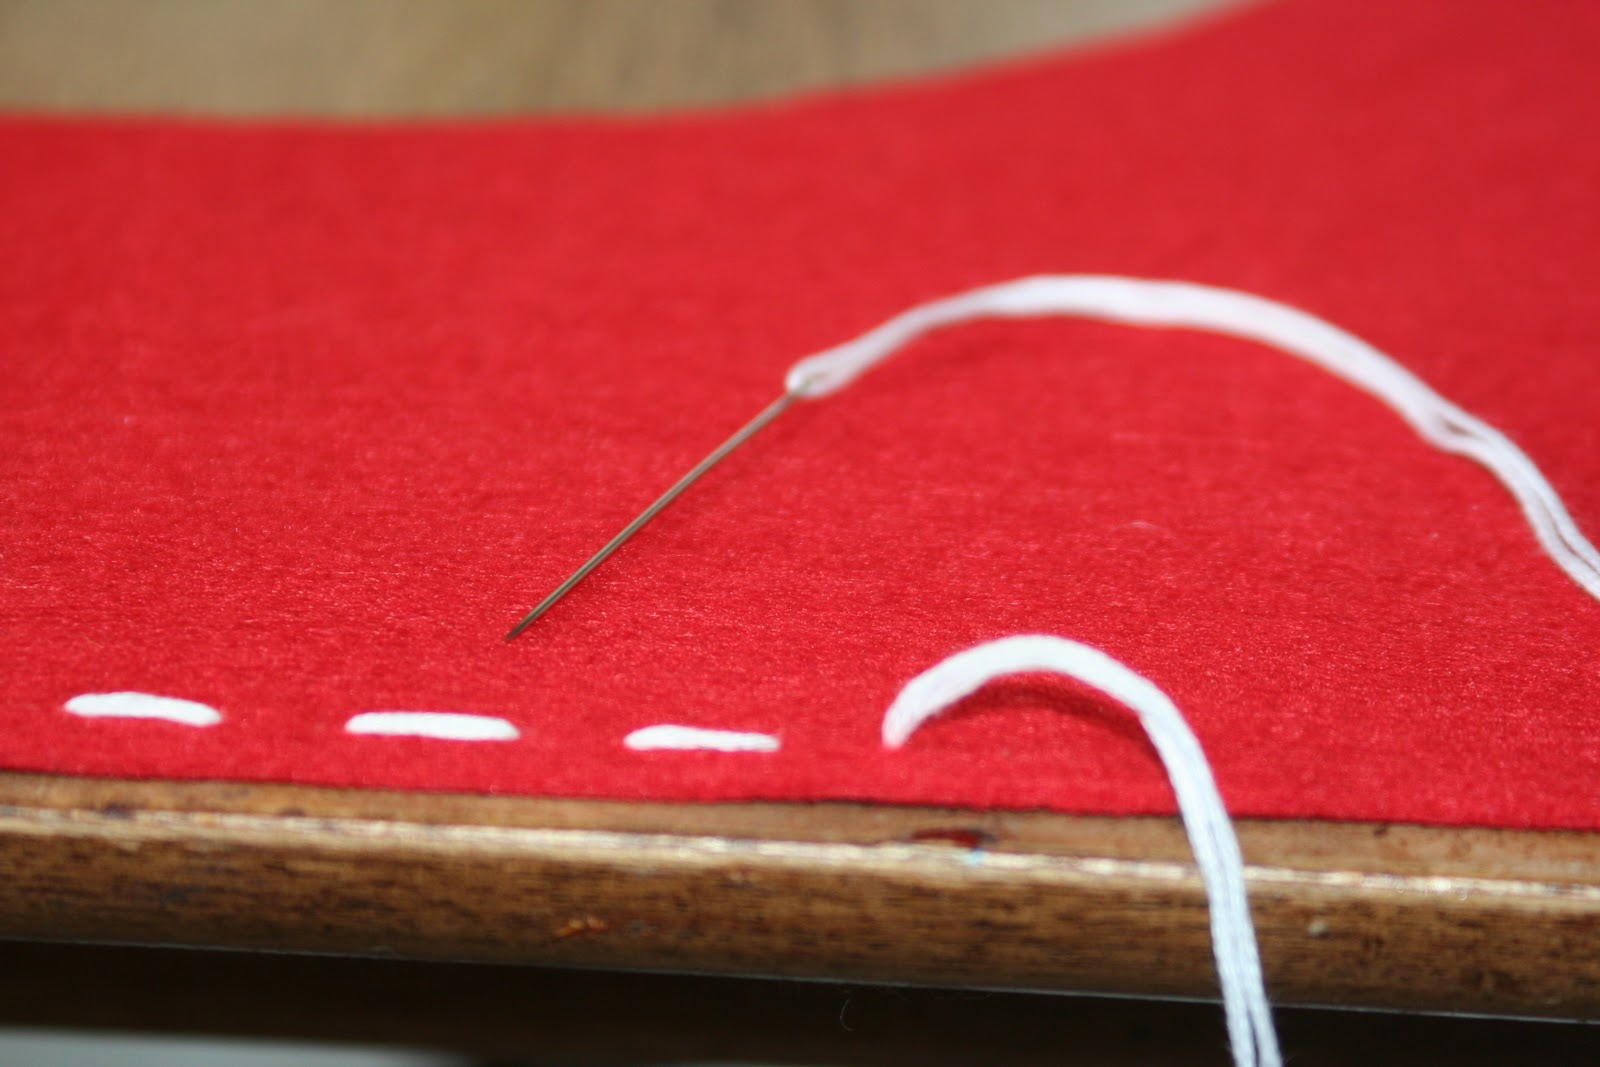
Here are my step-by-step pictures of it coming together. If you'd like the specific tutorial as to how to make these, just visit the Crafting Chicks website.


 |
| Her "L" has pink embroidery thread around it, but the flash washed it out. |
 |
| I took a picture of it next to my hand so you can see the size of the envelope. |
 |
| Free printable valentine cards from the Crafting Chicks I printed these off on some cardstock I already had. The girl's have had fun making cards for Daddy and drawing pictures for him on the cards! I plan to make little straps for it to hang on the back of a chair or on the wall. I want to make another one as well for my youngest daughter. I love how I can bring these out every year! This envelope was so fun to make, easy, and inexpensive. Just the thing to make little Lanes feel loved and special. I put little, sweet "i love yous" or candies or whatever to countdown to Valentine's Day. The Crafting Chicks have lots of great Valentine tutorials, so be sure to check them out. |

DIY: Gift Card Holder (or Hair bow Holder)
Posted by | Thursday, February 10, 2011 at 8:59 AM
Would it not be so dreamy if someone gave you a spread of gift cards for a special occasion? A friend of mine was recently put on bed rest in the latter weeks of her pregnancy. Our church rallied together to collect some gift cards to help out that family in these challenging days for them.
I wanted to organize them to make them presentable, instead of putting them all in a box or envelope. Below is the super-easy tutorial. I also used the same steps to make my girls' hair bow holder that hangs on the wall.
What you need:
-newspaper
-wood frame
-flat head screwdriver
-paint & paint brush (or spray paint)
-coordinating ribbon
-hot glue gun & glue sticks
-paper clips
-sticky adhesive (used hanging things on walls) *optional*


\
I wanted to organize them to make them presentable, instead of putting them all in a box or envelope. Below is the super-easy tutorial. I also used the same steps to make my girls' hair bow holder that hangs on the wall.
What you need:
-newspaper
-wood frame
-flat head screwdriver
-paint & paint brush (or spray paint)
-coordinating ribbon
-hot glue gun & glue sticks
-paper clips
-sticky adhesive (used hanging things on walls) *optional*
 |
| $2 frame from Goodwill. Always buy an all-wood frame. And that heart artwork...whew. It leaves something to be desired for sure. Don't let cheesy artwork deter you from buying a solid frame that could be turned into something great. |
 |
| I removed the back paper, the art, the mat and the glass. If there are staples, you will need something like a flat head screwdriver to help bend those staples up enough to get the glass out. |
 |
| Find a little helper to help paint. |

 |
| Painting finished |

 |
| Hot glue ribbon onto back of frame Be sure to pull the ribbon as tightly as you can, once you get one side glued down. Notice that I did not hot glue the ribbon on the very back of the frame, but instead on the inside of the frame. Right where the glass would sit inside the frame is where you want to glue down your ribbon, which gives you some room between the ribbon and the wall. If you're using this as a gift card holder, then ribbon placement really doesn't matter, but if you're making a hair bow holder, then it's nice to have a little bit of room for the hair bow to clip on so you don't scrape the wall. I don't feel like I explained that well, so feel free to ask questions if you have any. |
 |
| I like to space out the ribbon randomly on the frame, using wide and narrow ribbon. |
 |
| Almost finished... After I took this picture, I added one wide cream grosgrain ribbon in one of the middle gaps. |
 |
| Add gift cards with paper clips. I folded most of the paper part of the gift card, so as to provide more room on the frame and make for a prettier presentation. I tried my best to hide the paper clips. Be patient when trying to hide those paper clips. Take a few deep breaths if you get frustrated. It's only frustrating if you have to keep moving them, especially after you add the sticky foam tape too. I did a lot of moving around, because I get particular and picky, and I designed it as I went along. If you don't mind that the paper clips show, which is a fun look too, then it will be easy adding the cards. I even thought about using clothes pins, and that might look neat if you don't have lots of cards. |
 |
| I also used a foam sticky tape to make the cards more secure. The foam tape was leftover from my teaching days and is used to hang plastic hooks on the wall if you don't want to put a hole. It's not necessary to use this, but keeps the cards from shifting. Double-sided tape might work too or those little scrapbook squares. Project FINISHED! Now take a look at the before/after. Before:  After:  My friend loved the fact that this was a dual-purpose gift. She was SO excited that she could use the frame for her girls' hair bows as well, since she's having another girl! Happy Crafting! |
DIY Art Caddy
Posted by | Wednesday, February 9, 2011 at 11:28 AM
I recently ran across a DIY blog post from the Crafter's File Box on how to make an art caddy from a lazy susan, similar to the one Pottery Barn Kids has. I had a rather large lazy susan that I loved to use on our round table, but now that we have a rectangular table, it wasn't getting used as much. And I desperately was looking for a way to organize the girls' art supplies, yet make them readily available for my four-year old whenever she wants to create something.
What do you need:
-little buckets (dollar section at Target)
-one large bucket (optional, dollar section at Target)
-Drill, drill bits, short screws OR strong glue like E-6000 (Hobby Lobby)
-paint and paint brushes, if not using spray paint
-sand paper
-face mask or rag
What do you need:
-little buckets (dollar section at Target)
-one large bucket (optional, dollar section at Target)
-Drill, drill bits, short screws OR strong glue like E-6000 (Hobby Lobby)
-paint and paint brushes, if not using spray paint
-sand paper
-face mask or rag
 |
| I used Rustoleum Heirloom White, only because I had it on hand. Otherwise, I would have used regular paint. I have come to the conclusion that I just don't like spray paints, but I did like how quickly it dried. |
 |
| Lazy susan slightly sanded to rough up the surface and help paint adhere. |
 |
| Here I am sanding the freshly painted surface and distressing the edges. FYI: Use gloves. So much paint dust got on my hands and under my fingernails, as I sanded. |
 |
| Two reasons you need a face mask: #1: Breathing in paint dust CANNOT be good for you. #2: They just make you feel so darn cool. |
 |
| Word on the street has it that if you don't have this glue in your crafting supplies, you're not a REAL crafter. GULP. I ran out to buy this glue asap, costing a mere $3.99 from Hobby Lobby. The Crafter's File Box tutorial used this glue to secure her buckets to the LS, but since the temp was too cold for it to dry in the garage, and it had a VERY strong odor, my husband suggested screwing down the buckets instead of gluing them. I was glad we chose this method of securing the buckets. And I am happy that I have E-6000 on-hand now. |
 |
| Pre-drilling the bottom of the buckets Little buckets: I REALLY wanted to use solid-colored buckets with girly colors, like the big, pink one in the middle of the caddy, but Target only had the princess ones. These are fun for Laney, because they are princesses, plus they fit the budget at $1 a piece. Hobby Lobby had some solid colored buckets in their Spring section, but they were $2 a piece. The main goals of this project were: to be creative with what I had on hand, provide space for the girls' art supplies, and spend as little as possible in the process. For those who have boys, Target had boyish Batman buckets as well. Another option is to use half boy/half girl buckets. |
 |
| Up-close of pre-drilling. DH didn't want to put any pressure on the bottom of the buckets while screwing it onto the lazy susan, so as to avoid bending the metal. This worked great. |
 |
| It's helpful, but not necessary to have someone hold the bucket while someone drills. I was the helper while DH handled the power tools. Next time, I want to drill. Ar! Ar! |
 |
| The view inside the buckets after being secured to lazy susan with a screw. |
 |
| Half way done: I added the big bucket in the middle to hold bigger items like water color paints, etc. |
 |
| Four buckets attached, four more to go. |
 |
| Trial run: Laney was SO excited to put her art supplies into the buckets! In this picture, I only had four little buckets. I added four more buckets a few days later. All done! |
 |
 |
| Overhead view of finished product Still hoping to add some paint brushes and a few other things to her supplies. Any suggestions? |
 |
| I must say, I absolutely LOVE how it came out. I love how practical it is. And most of all, the girls love it! |
Subscribe to:
Posts (Atom)